[This page has A LOT of pictures, so be patient and let them load]
The power created from 9 psi of boost made my stock, original clutch start to slip quite a bit, so my dad and I went ahead and replaced it with an ACT street clutch, which holds a lot more than stock but still has a light, streetable feel to it. While we were at it we ditched the 28 pound flywheel for an aluminum Fidanza one that weighed only 11 pounds. An ASP crank pulley replaced the heavy steel one and shaved another 5 pounds of rotational weight, and the front main seal was replaced at the same time. The front main seal began leaking soon after, but I couldn't tell if this was from an installation error or the fact that I had switched to Mobil 1 synthetic motor oil. After replacing the seal for a second time and still seeing leaks, I knew the synthetic oil was the manifest culprit. I switched back to regular 5w 30 penzoil and it no longer leaked.
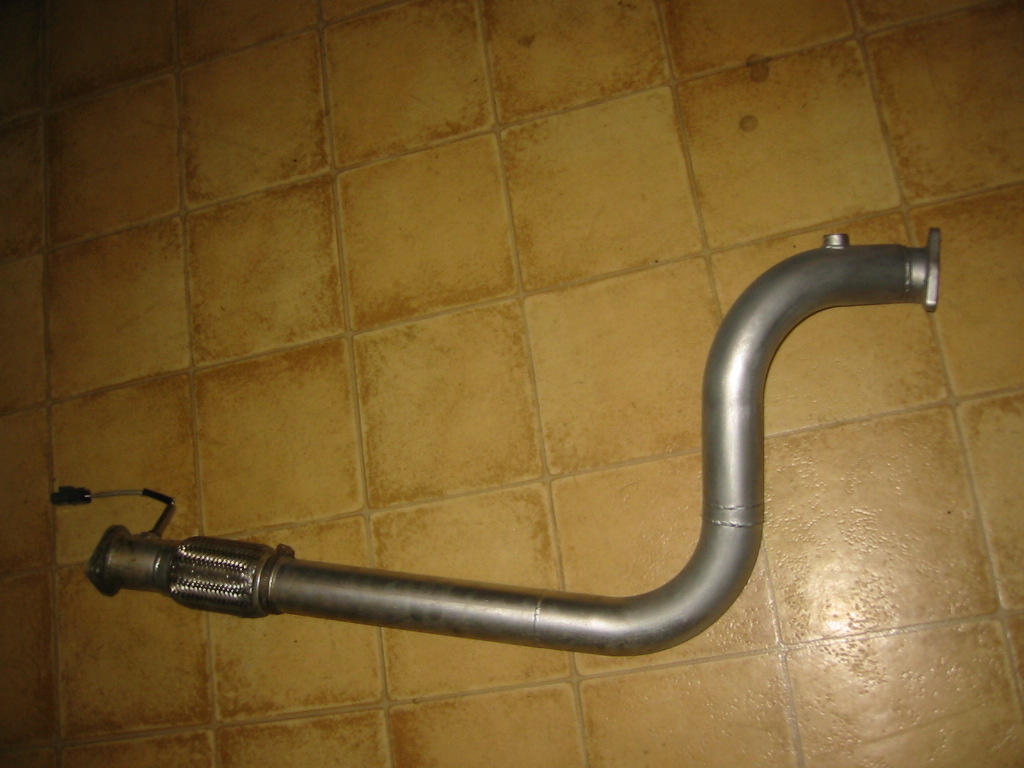
I was still disappointed with losing boost in the upper RPM range with the tiny straight T3 and actually bought a T3/T04B turbo in hopes of it producing substantially more air in the top part of the powerband. However, seeing that the T3/T04B would not fit without a variety of modifications, I decided to re-work the downpipe to have better flow in the upper RPM range; my friend Cory helped with the welding. The stock downpipe was 2.25" crush-bent piping, looked horrible, had clumpy welding, and clearly didn't flow very well. Replacing the entire downpipe to the area where it meets up to a straight pipe used in place of a catalytic converter made quite a bit of difference and it flowed a lot better--and of course, it felt quite a bit faster. I recently removed the Tanabe resonator near the end of the exhaust system and had it replaced with straight pipe because the resonator's restrictive inner fins were hampering flow; now I lose at most 1-2 psi of boost in the high RPM range; on a cold night I'll lose none. The integrated flex pipe cured the problems of my downpipe bolts periodically rattling off like they used to do.
Here's a picture of the downpipe (and oxygen sensor):
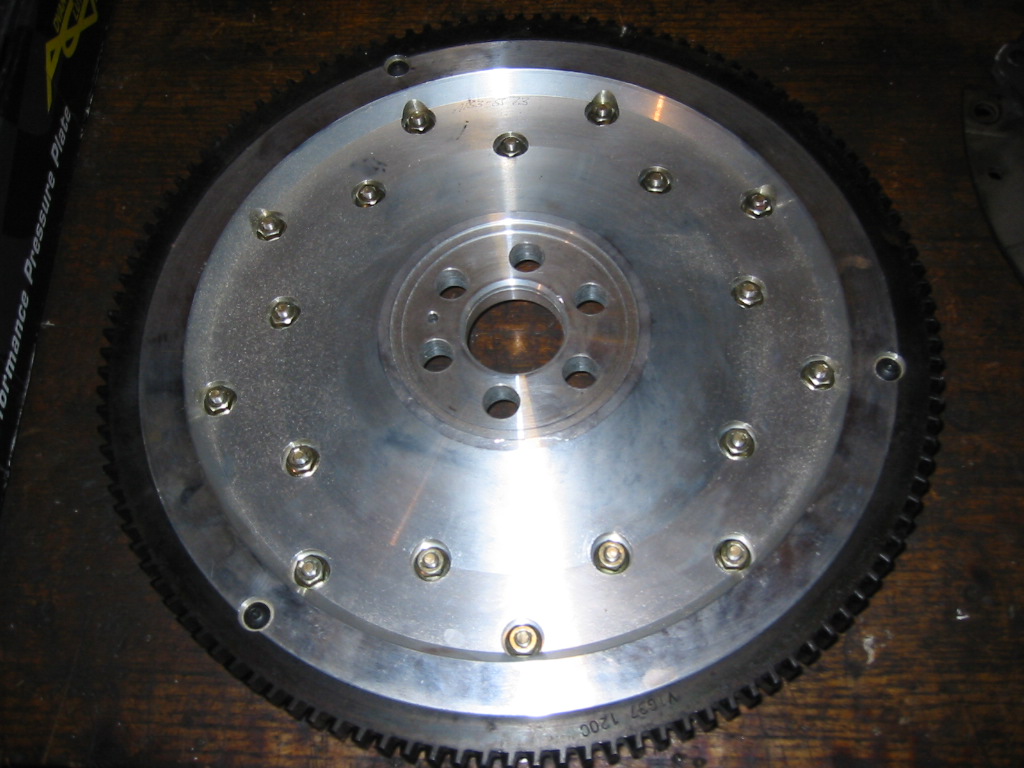
The Fidanza aluminum flywheel shaved off 17 pounds of internal rotating mass--and over a very large diameter. Coupled with a lighter aluminum pulley (minus 5 pounds), the engine runs much more spiritedly up and down the rev range. While the RPMs do drop quicker now when the clutch is depressed, the overall increased responsiveness of the engine made it worthwhile--besides, faster dropping revs meant I just needed to learn how to shift more quickly! Surprisingly, these lighter rotational components did not make the car more prone to stalling, nor did it compromise the car's more utilitarian function when used as a daily driver.
Here is a picture of the flywheel:
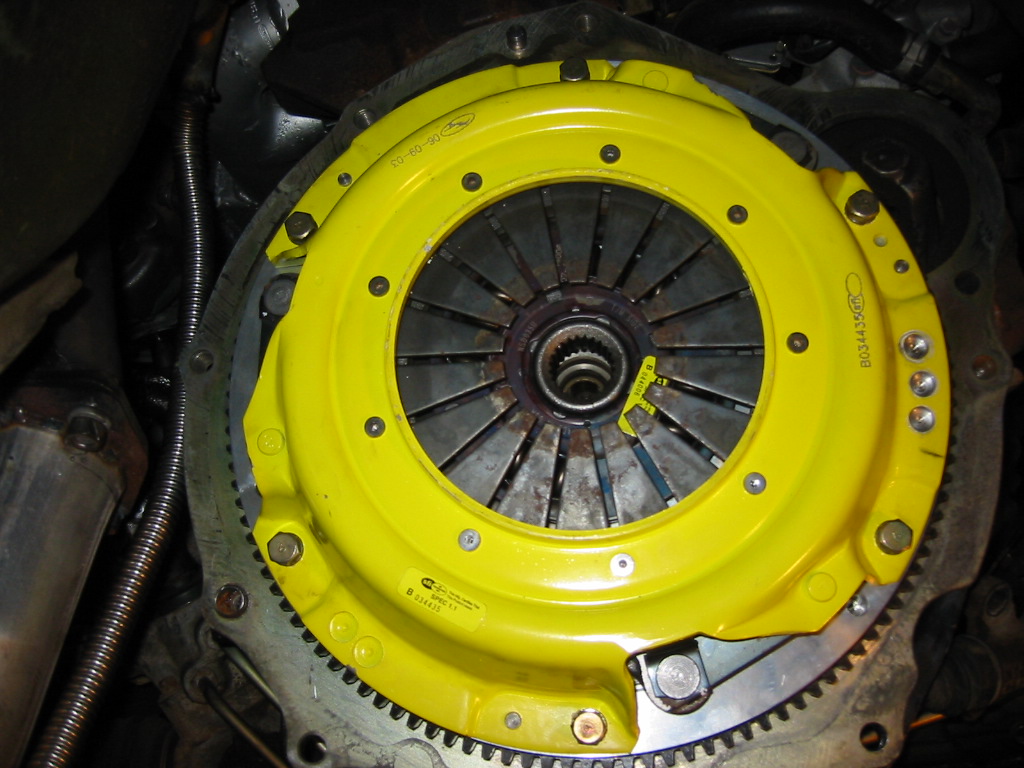
Above is the ACT street clutch installed. Note to the left the crappy original downpipe which has since been replaced. By the way, it's an extremely good idea to drain the tranny fluid before doing a clutch job, unless you like synthetic oil all over you... (some of us do!).
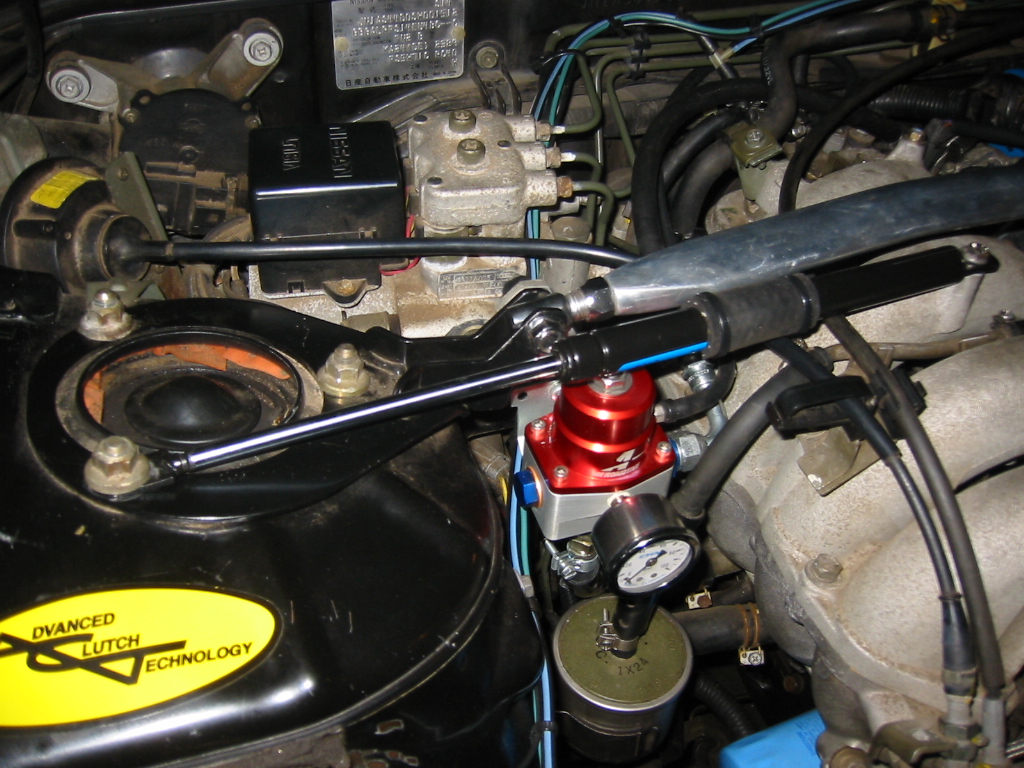
Over the winter (2004-5) I did quite a bit of work including replacing the upper timing chain, and upgrading my whole fuel system. A walbro 255 lph (liter per hour) high-pressure fuel pump replaces the stock S14 unit (word of advice for those replacing fuel pumps--do NOT replace it when there is 2/3 of a tank of gas!!). The stock 270 cc/min (or 280 cc?) fuel injectors were replaced with SR20DET 370 cc/min injectors that RC-Engineering cleaned, rebuilt, flow-tested, and blueprinted to work perfectly together as a set. The stock FPR (fuel pressure regulator) was replaced with a billet aluminum Aeromotive adjustable unitwith a liquid-filled pressure gauge, located near the passenger side strut tower for easy viewing. To get the new FPR over there, my dad and I fabricated a 90 degree nipple that bolts into the stock fuel rail and has a nipple pointed away from the head/fire wall, with a hose attached to it so that the aeromotive unit could be remotely mounted.
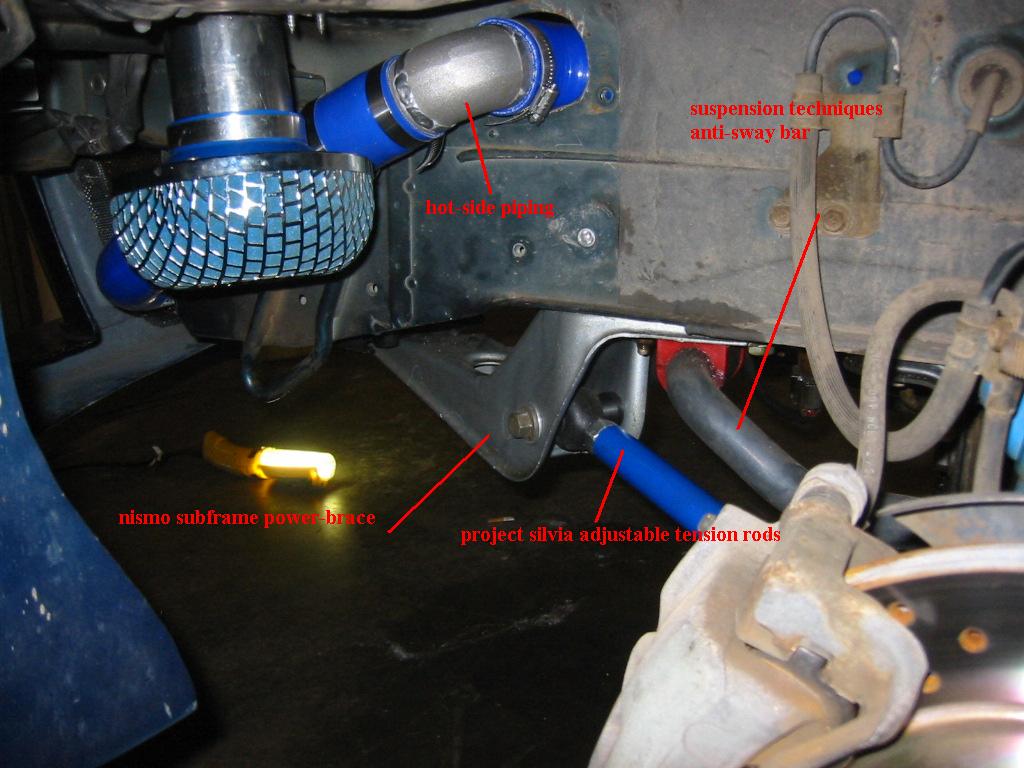
A JWT-ECU replaced the stock ECU and was programmed to handle both boost and the larger fuel injectors. The ECU also bumps the redline from 6500 rpm to 7200 rpm (the S13 KA redlines at 6900 rpm and has identical specs to the S14 KA except for more aggressive camshafts), and removes the speed-governor. (I know, because I've had the speedometer buried before). I also replaced the oozing OEM tension rods with adjustable Project Silvia units that do away with bushings and have spherical bearings, and I finally replaced a bent "sub-frame" with a nismo sub-frame "power-brace." The two suspension modifications in conjunction with each other greatly increased turn-in response and made the steering feel a lot more sporty.
Note the S/T sway bars, poly bushings, project silvia tension rods, cross-drilled KVR rotors, and nismo subframe :)
The turbo setup was becoming more and more refined, but it wouldn't be complete without intercooling, even though it had been relying on methanol injection from the beginning to eliminate the possibility of predetonation.
Finally Intercooled!
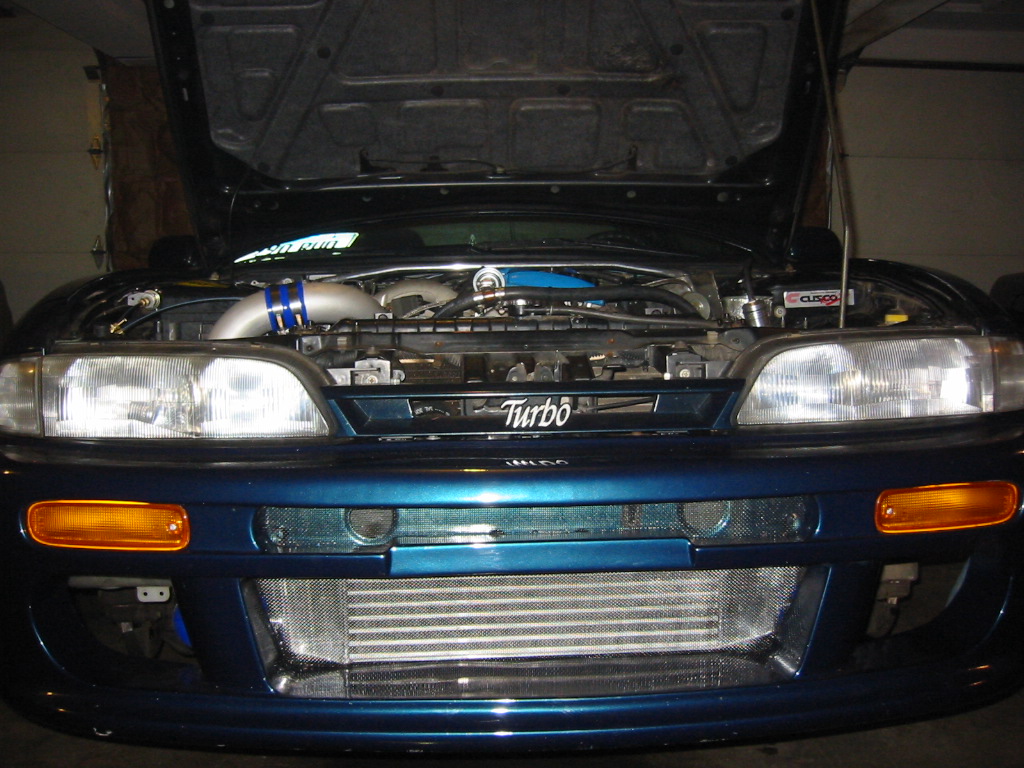
What's that shiny heat exchanger? the A/C condenser? I don't think so!
In the spring of 2006 I *finally* got around to intercooling the KA-T. Before, I felt no need to because the methanol injection worked so damn effectively, but I was longing for that aggressive symbol of power lurking within the front bumper. The intercooler is a 26" x 8" x 3" tube and fin, billet aluminum, CNC'd unit from JGS Tools and it outflows the same size spearco core with very little pressure drop. It works extremely well. The way it's plumbed, ALL of the air that goes through the bumper first goes through the intercooler, then the oil cooler, then the 2.1" Koyo aluminum radiator, which was not yet installed when the pics below were taken. The intercooler did such a good job robbing all the ambient air that the stock radiator just wasn't cutting it in the summer heat, so an all-aluminum Koyo that's twice the size (and looks twice as nice) of the OEM one now sits up front as well.
The intercooler fits very snugly between the oil cooler and the front bumper, and is not so low so as to make it vulnerable to road debris. The oil cooler is thermostatically controlled, and it has been on the car since the start of the turbocharging project (By the way, I strongly suggest the use of an oil cooler after a naturally aspirated engine is turbocharged. The turbo bearings are so hot that they can increase the overall oil temperature in the engine noticeably; an oil cooler will keep temps down, and a thermostat will ensure that the oil also is not too cool.)
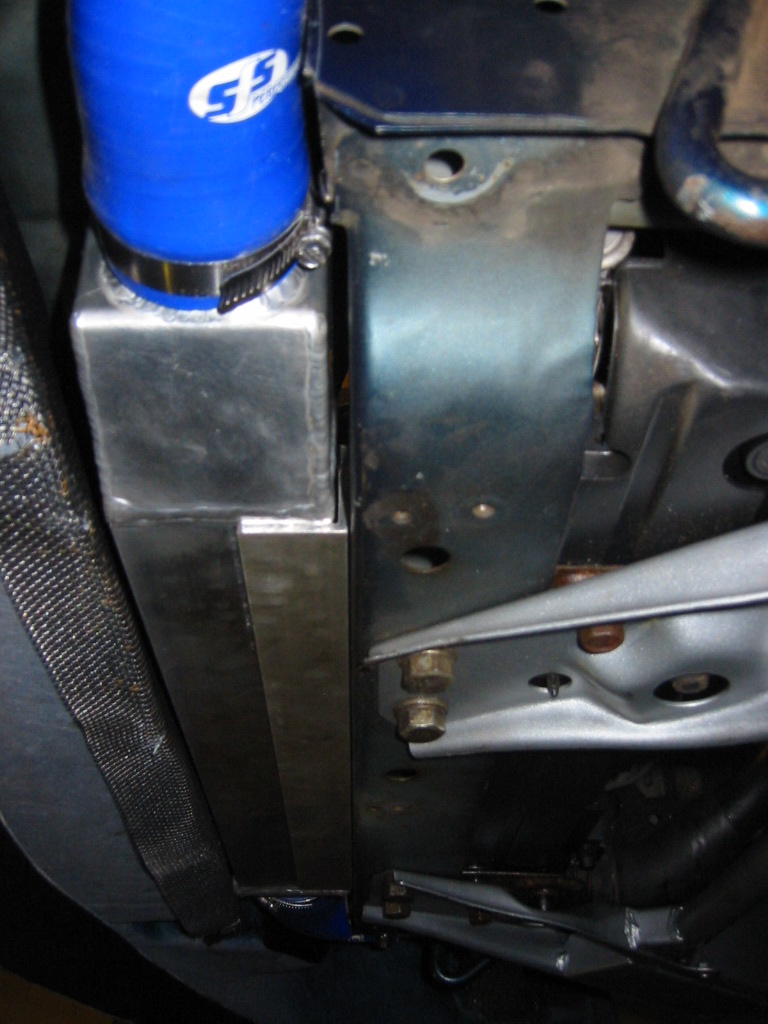
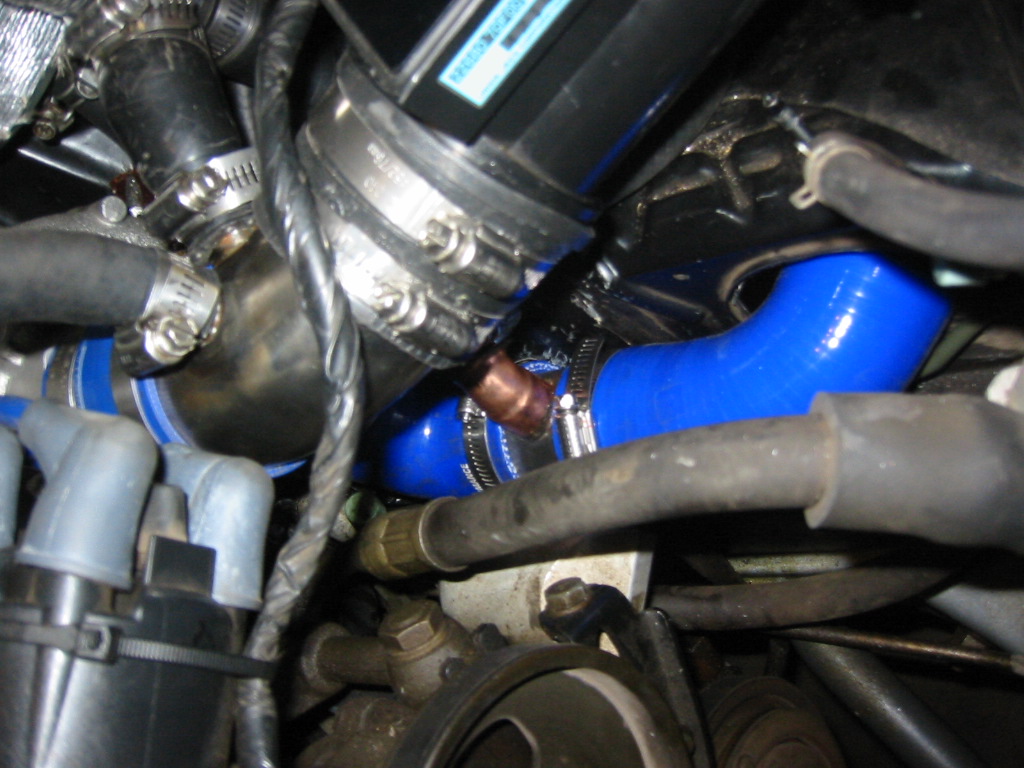
Hot side of intercooler
A lot of people stupidly discard that bulky bumper support sitting in front of the intercooler--but if I ever get in a crash, I know i'd want that stamped steel protecting me and my precious engine bay. Not to mention this bumper support covers only about an inch of the intercooler, and there are holes in it through which air can flow to reach the intercooler anyway.
This is the hot side from underneath the car. The piping follows the frame very snugly. You can see that in order to fit the intercooler/hose flush to the frame, some of the metal bumper was trimmed.
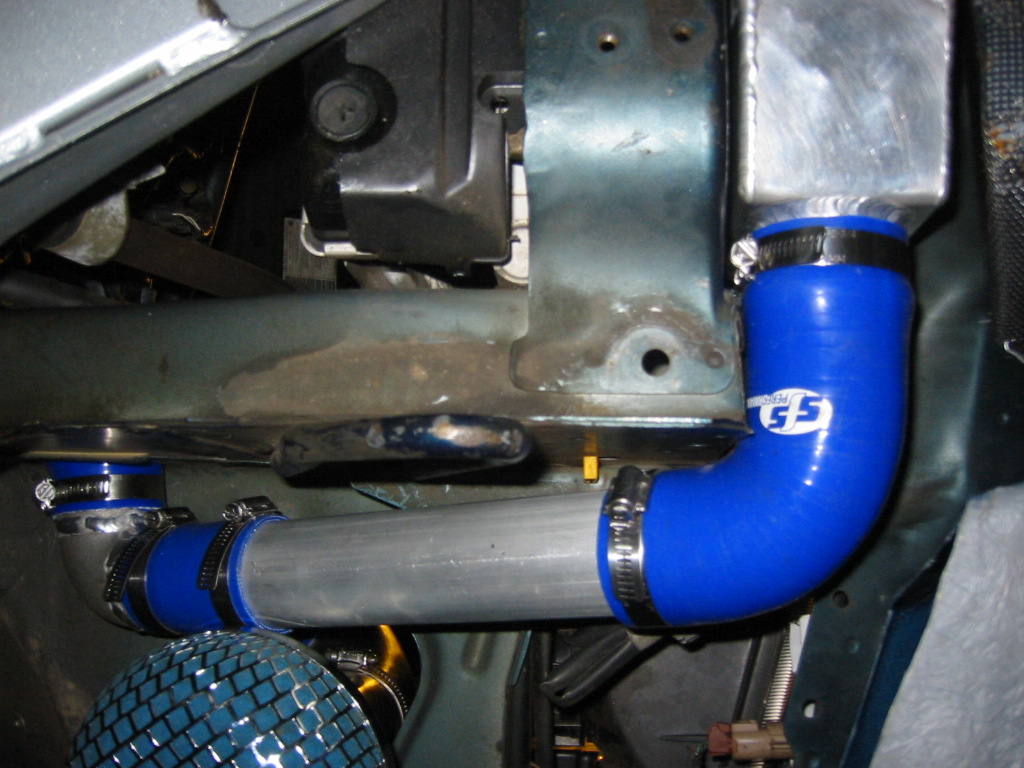
Here you can see the extensive use of extremely high quality (and expensive!) multi-ply, high pressure, high-temperature silicone. I sourced the hose from Pegasus Auto Racing, a store that usually has really high prices, but for silicone their prices were competitive; not to mention their service is top-notch. A parenthetical word of advice to those undergoing a turbocharging project: Don't cut corners or take short cuts. If parts cost a lot, there's probably a reason for it. Home depot PVC hose-clamps and rubber connectors do NOT cut it, even under mild boost applications-I know, because I blew a pipe off straight into the woods on a test-run once. Good thing I was only a street over from my house.
The hose clamps in the picture are stainless steel heavy-duty worm clamps that are designed for use with silicone so they do not cut into it. The hot-side piping from the turbo goes through a hole in the frame that is actually already there in stock Zenkis (95-96), but is covered up by a piece of metal bolted in with 2 bolts. Clearly this hole is used for intercooling in the Japanese versions of the S14, which use a side-mount intercooler that sits in the front right bumper.
Like many other parts of the original turbo kit, the Mass Air Flow Sensor (MAFS), turbo inlet pipe, and part of the hot pipe were all later upgraded.
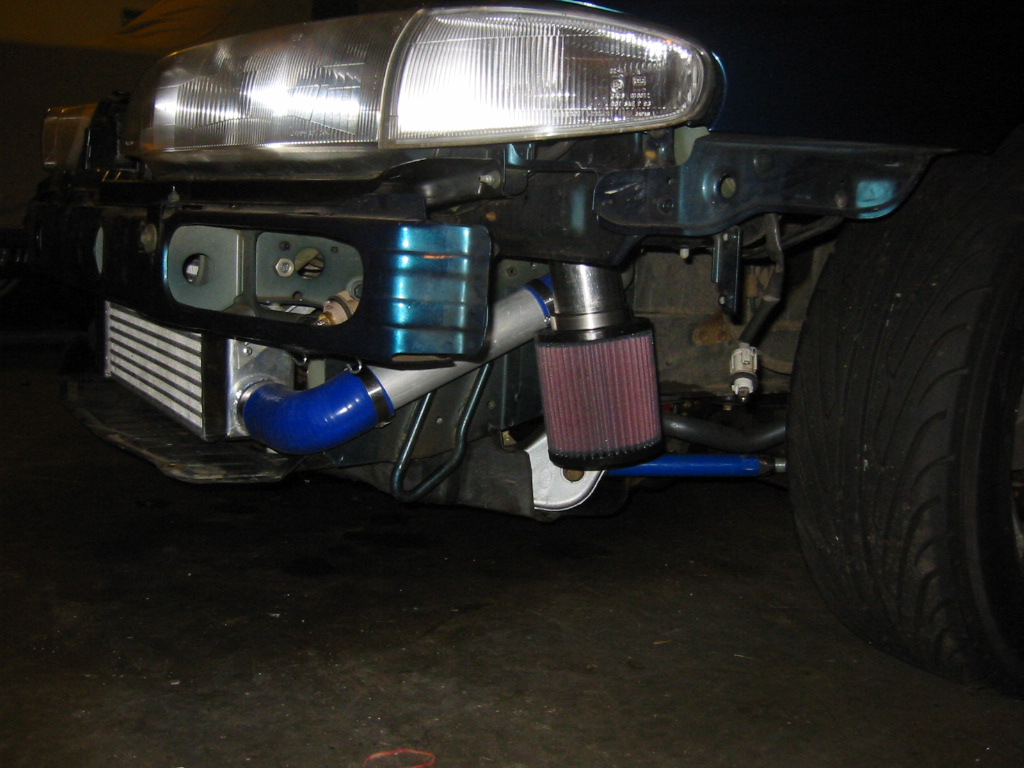
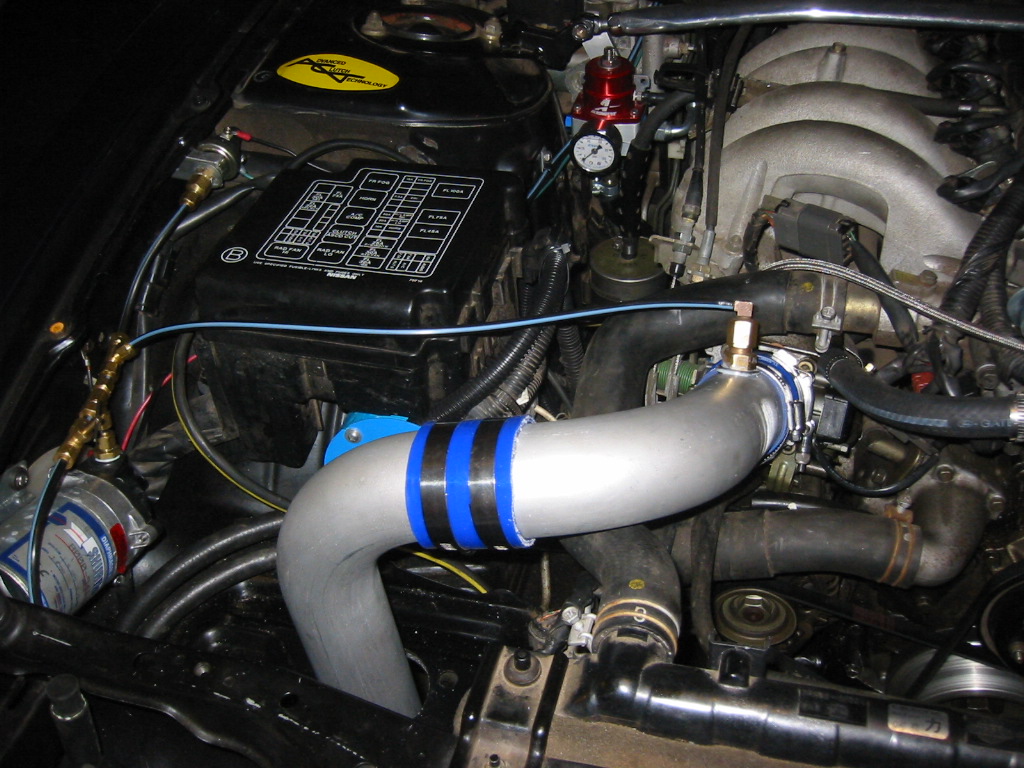
Cold side of intercooler
The cold side of the intercooler consists of a 90 degree silicone 2.5" ID (inner diameter) connector, a straight aluminum pipe, a 45 degree silicone connector that goes through a hole in the battery tray, and 2 more 90 degree aluminum pipes. The battery was relocated to the passenger side of the trunk for better weight distribution, traction, aesthetic, and practical purposes. It's a lot easier to plumb the cold side of an intercooler on an S14 with that unsightly battery out of there...Even though 93 octane gasoline, conservative timing, and an extremely efficient and effective intercooler do an adequate job of preventing any forms of detonation, the alcohol injection was kept for insurance purposes.
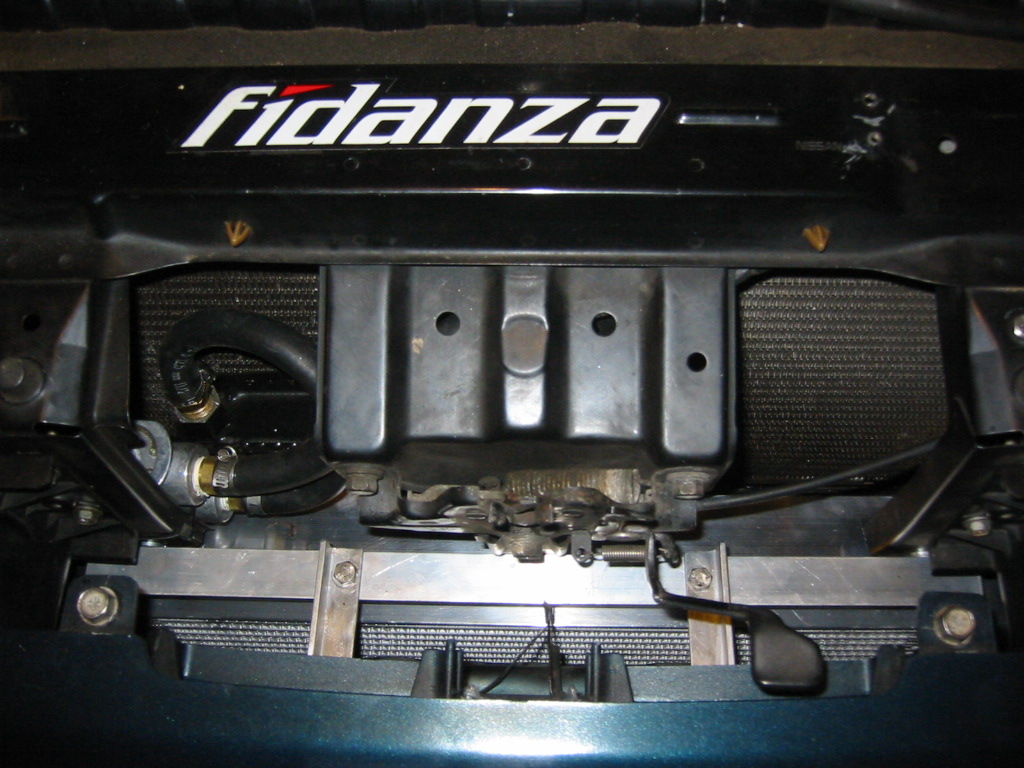
The two aluminum bends that go to the throttle body were later welded together for reliability and a more professional look. All of the aluminum bends were purchased from Burns' Stainless (www.burnsstainless.com), a company that sells a huge variety of mandrel-bent and straight piping. And the ugly black plastic radiator was later replaced with an all-aluminum Koyo radiator that was twice the thickness of OEM.
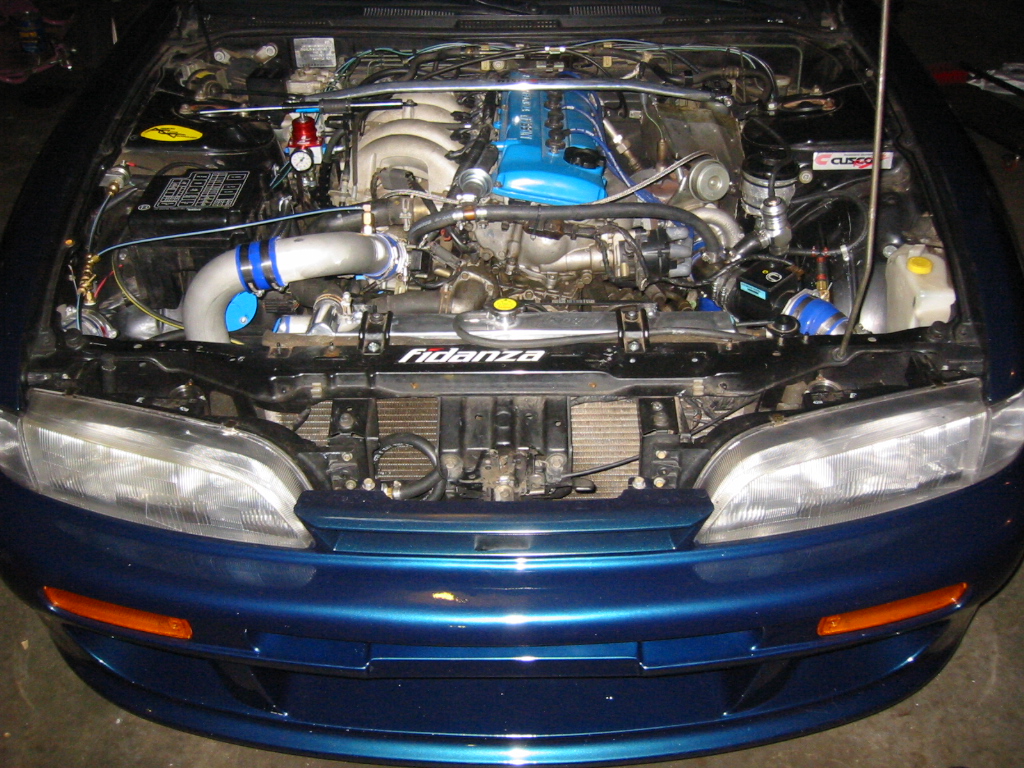
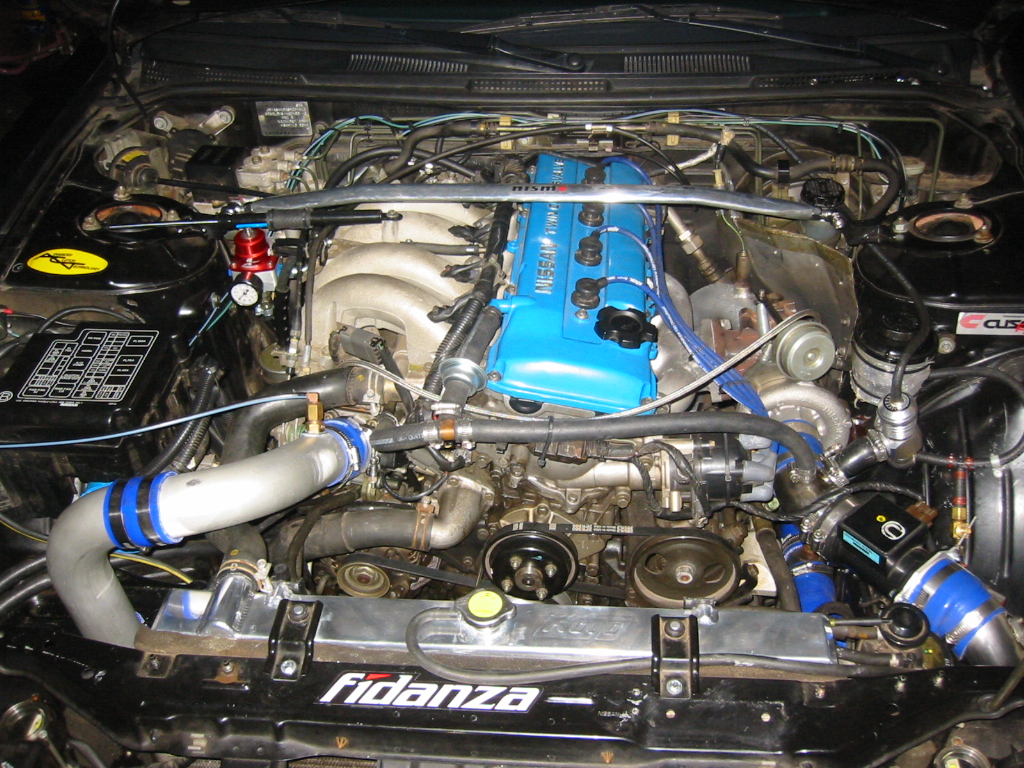
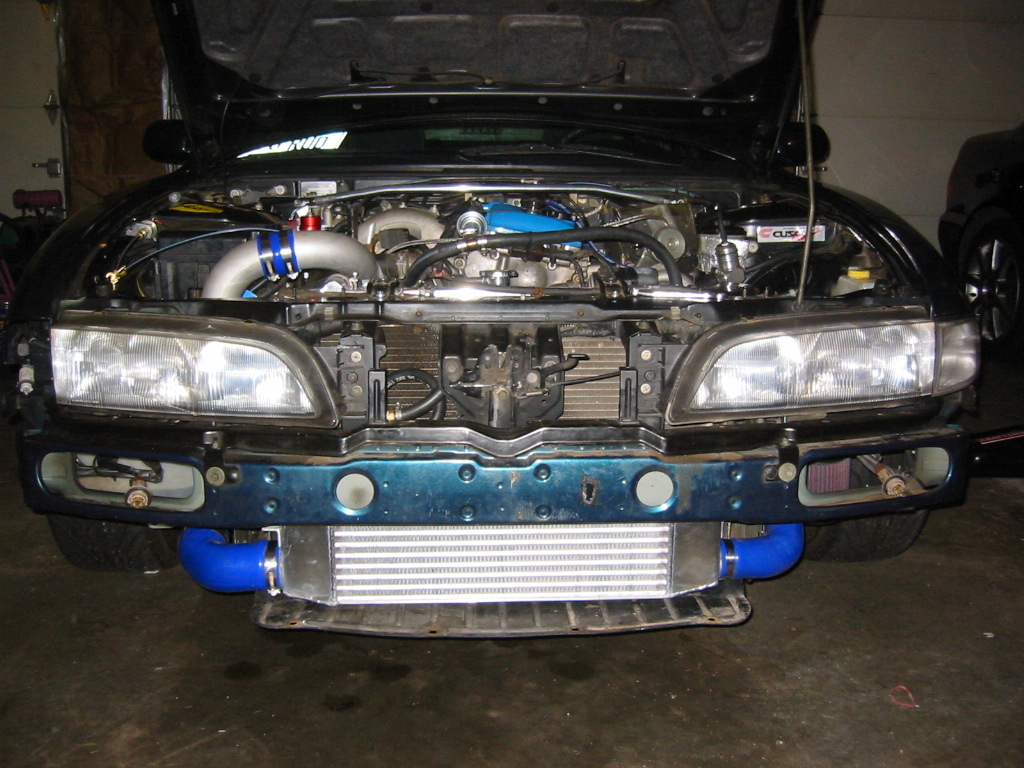
Here's a good shot of the whole engine bay from the front of the car. Note that at this point, the Koyo aluminum radiator has been added.
And here's a picture of the engine-torque brace that was installed around the time of the intercooler installation (it was a custom job, only cost me $20, but looks like it was designed for where it's mounted). It worked very well, but perhaps too well because it transmitted more vibration into the cabin. I eventually removed it.
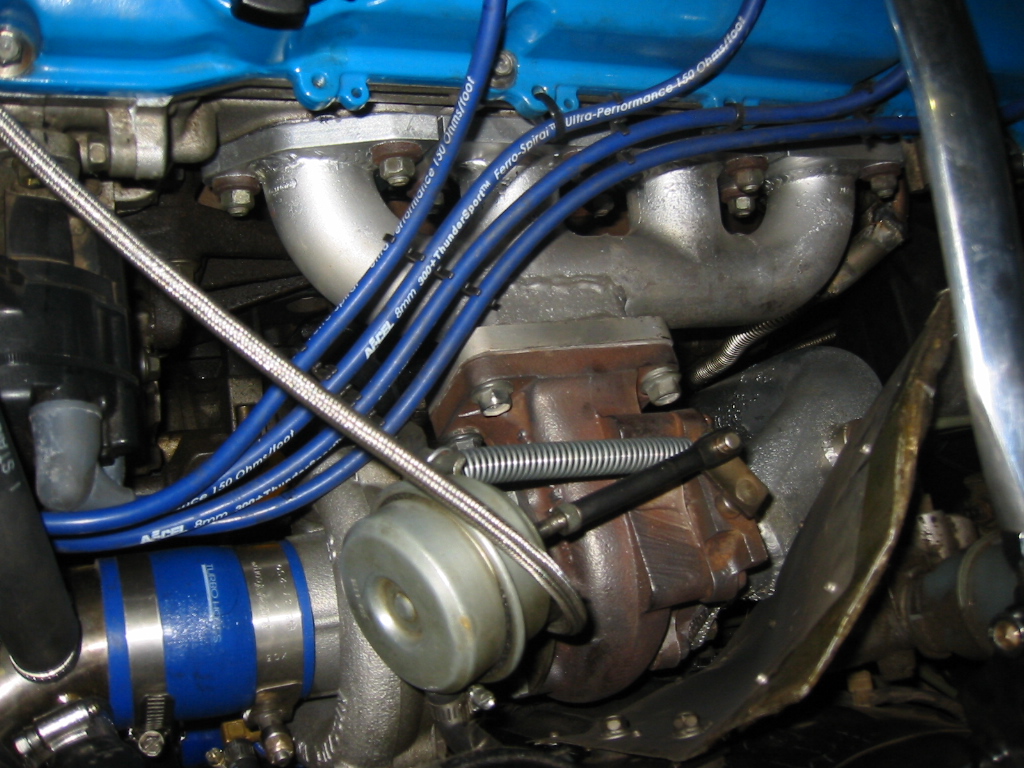
Here is a shot of the turbo, heat shield, downpipe, and log manifold. By putting more tension on the wastegate actuator, the pull spring near the wastegate rod on the turbo was used to prevent boost from bleeding off at higher pressures.
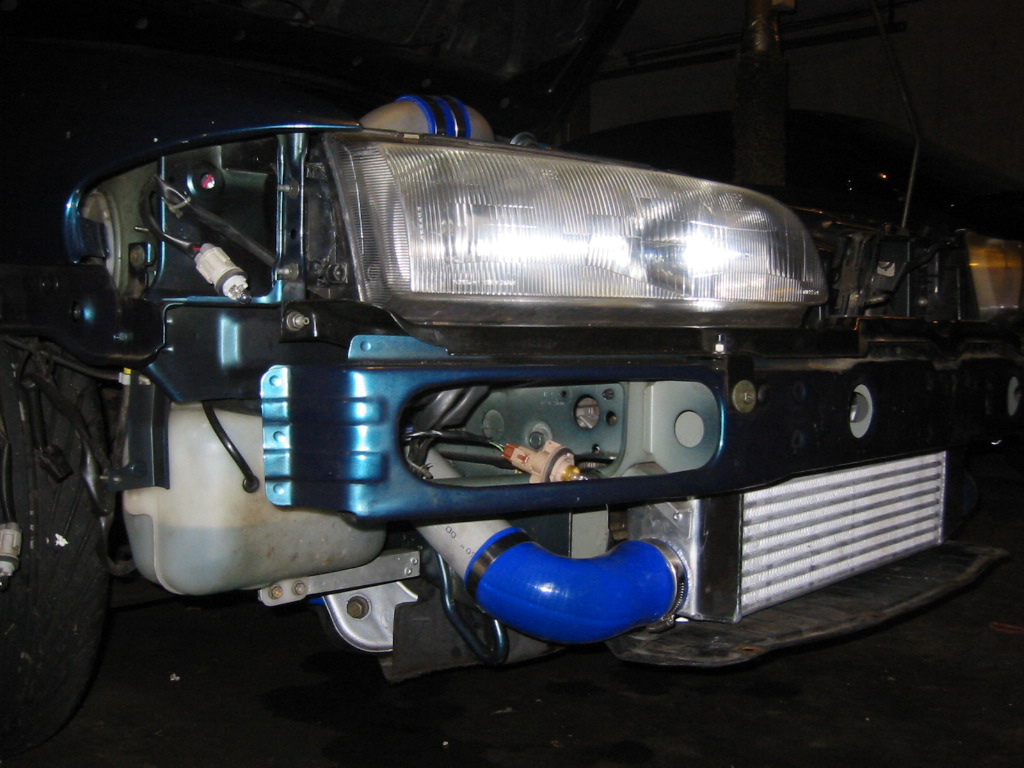
Here's the quintessential intercooler shot with the front bumper off. Anyone who's every done a turbo install always takes a shot of the intercooler mounted without a bumper. Why? Because it looks downright menacing!
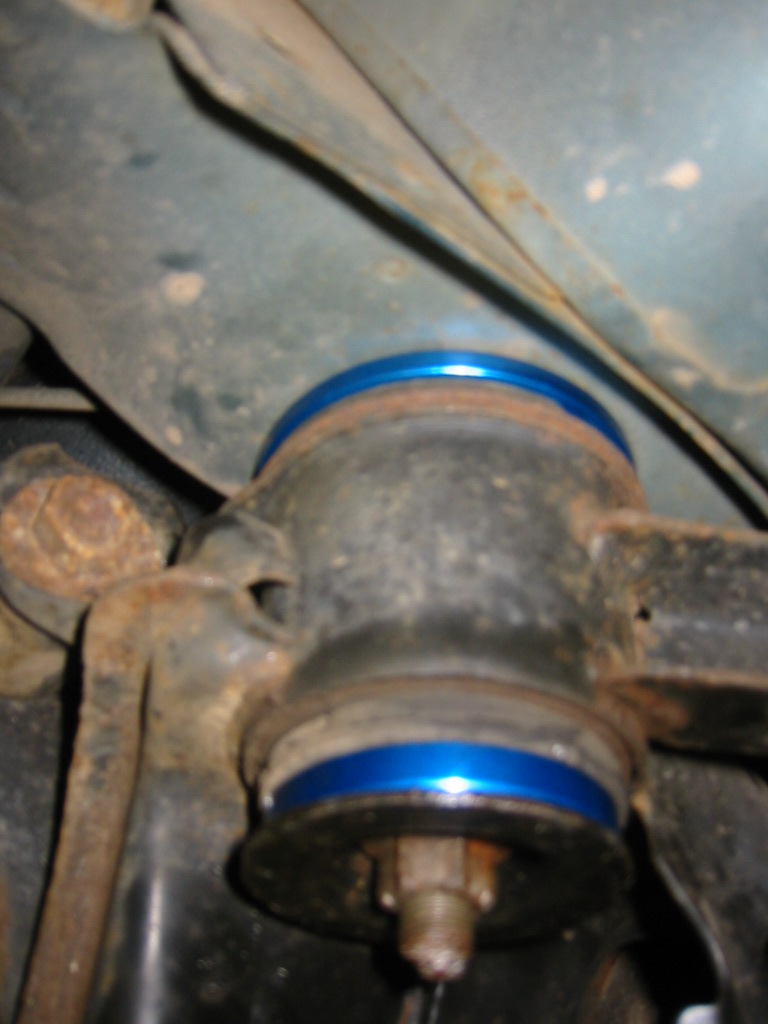
In the fall of 2006, the suspension and brake lines were upgraded. I installed aluminum SPL subframe bushing collars (http://www.splparts.com) to tighten up the connection between the rear subframe (to which suspension components are bolted) and the actual frame. This modification eliminated any sloppy feeling in the rear end and overall gave the car a tighter, smoother feeling in the rear. It feels even more glued to the road now. Plus, some sweet Cusco blue was added to the under carriage :) The car is very neutral at the limit due to excellent weight distribution and a stiff rear end (anti-sway bar, strut tower brace, bushing collars, etc).
Here are the collars...
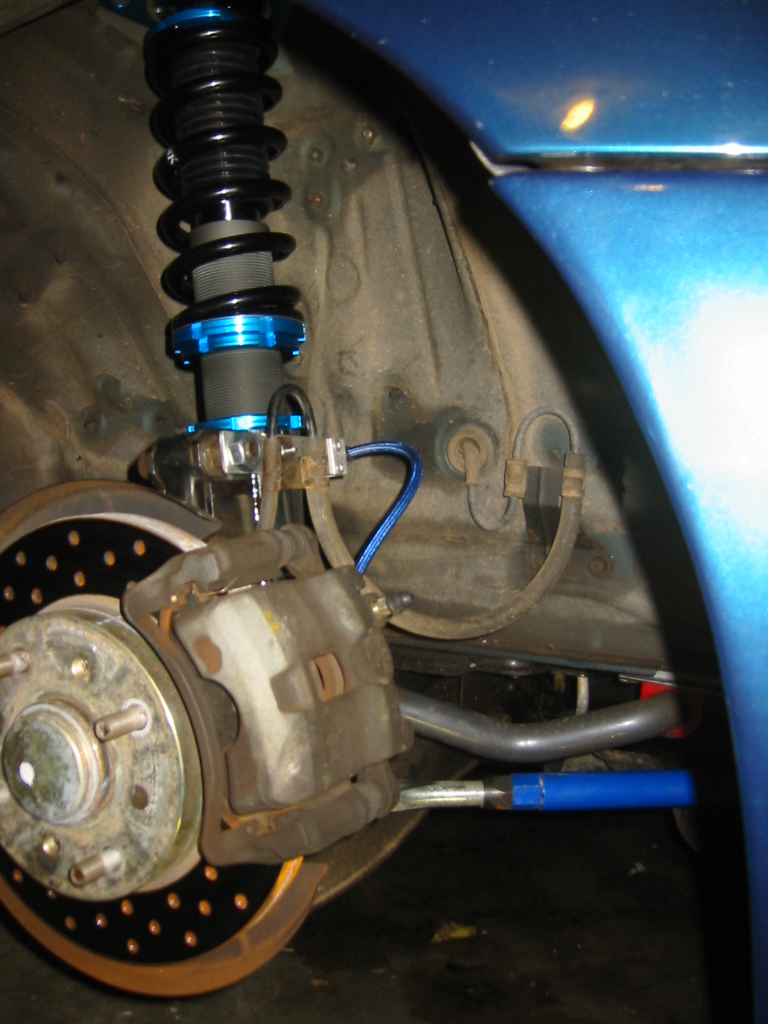
...and in the two pictures below we see fully adjustable KTS coilovers, purchased from SPL parts. Adjustable height, spring preload, damping (15 way) and camber (in the front). With 8 kg springs in the front, and 6 kg in the rear, the car has no detectable body roll--it exhibits the definition of flat cornering. Aesthetially, the car looks a lot better because it has virtually no fender gap.

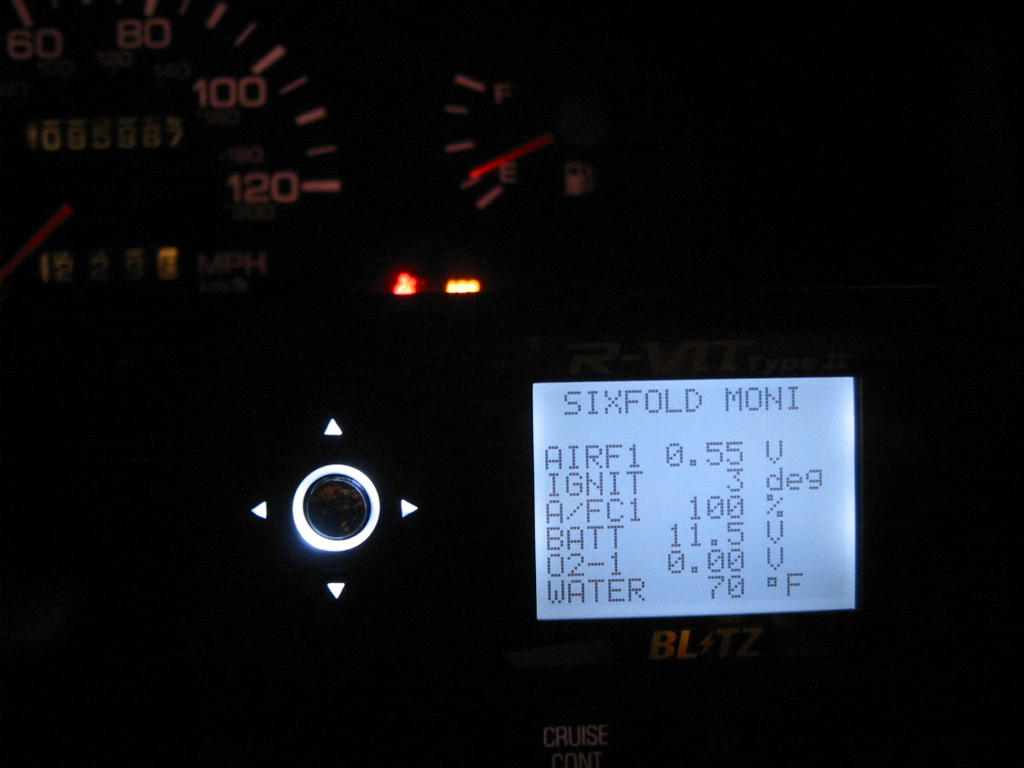
Soon after the suspension upgrade, at the end of August of 2004, I added a Blitz R-VIT, which allowed me to monitor twenty vital engine parameters. The unit plugged into the DDL (Nissan Consult) port in the fuse box located in the driver-side footwell. The unit definitely spiced up the interior and it was mounted for easy viewing. Excited by the new gizmo, I started to record some data. Particularly illuminating were the data I got on the ignition timing, based on a JWT ECU tuned for 370 cc/min injectors and 8.5 psi from a T3 Super 60. The timing at the distributor was set to 20 degrees BTDC (before top dead center).
Here are some specs on my KA-T's timing (at that time hehe)...
1st gear 4000 RPM (full boost), 13 BTDC
1st gear 4500 RPM, 13 BTDC
1st gear 5400 RPM, 15 BTDC
1st gear 5850 RPM, 17 BTDC
1st gear 6787 RPM, 17 BTDC
2nd gear 5000 RPM, 15 BTDC
2nd gear 6000 RPM, 17 BTDC
2nd gear 6762 RPM, 18 BTDC
3rd gear 5000 RPM, 14 BTDC
3rd gear 6000 RPM, 17 BTDC
3rd gear 6762 RPM, 18 BTDC
4th gear 5000 RPM, 12 BTDC
4th gear 6000 RPM, 17 BTDC
Based on these conservative timing numbers, I decided to advance my ignition timing 2 degrees at idle, from 20 degrees BTDC to 22 degrees BTDC. I hoped that this timing advancement would help eliminate some low RPM hesitation/stumbling that I was feeling, and it did. The car ran better and smoother all around.
It sure feels fast...but how about some empirical data?
I did some 0-60 tests and 1/4 mile tests with an accelerometer called the G-Tech Analyst, proven to be accurate to within 1/10th of a second for 1/4 mile and 0-60 runs, and within +/- 1 mph for trap speed.
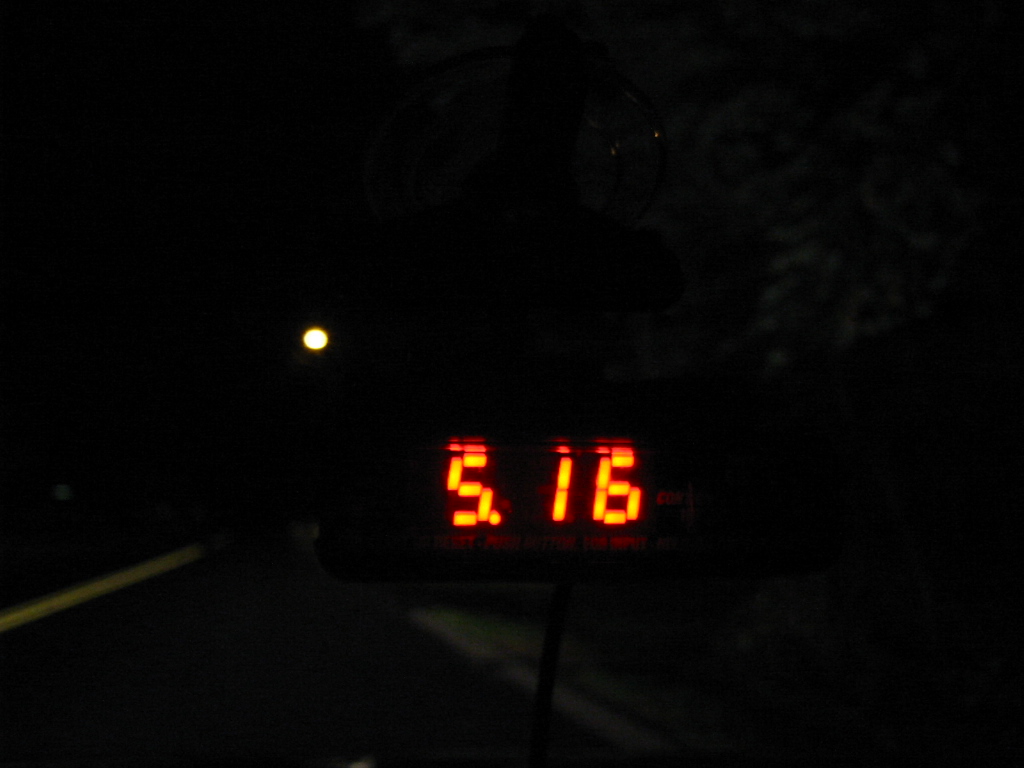
The key to getting ANY good time for 0-60 or 1/4 mile tests is the launch, and simply put, I'm terrible at it. I'd either let the clutch out too fast and just smoke the tires or let the clutch out too slow and just bog the innards out of the car. It was VERY hard to find a happy medium, but when I did, it was immediately apparent that the car was commendably quick. All of the runs were done with the car weighing 2940 pounds (165 pound driver, 6 gallons of gas, all fluids) @ a maximum of 9 psi (past 5500 RPM, it's about 7-7.5 psi).
Best 0-60 was 5.16 seconds, substantially faster than my best time of 5.72 the last time I tried it.
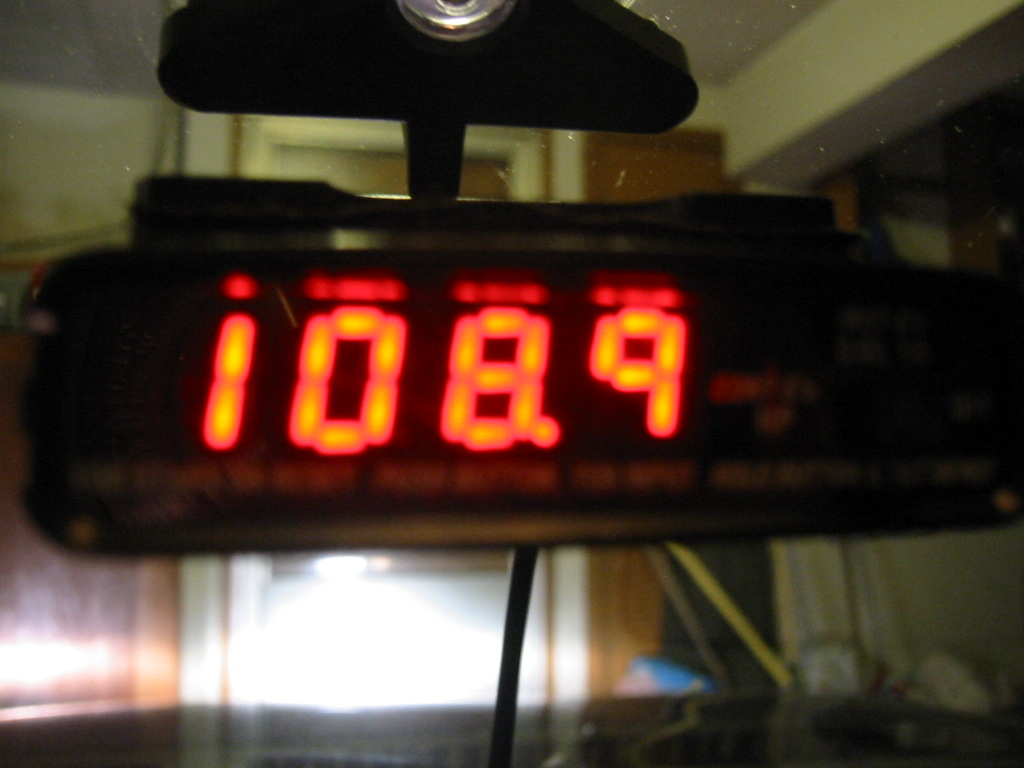
Best quarter mile run was 13.86 @ 108.9 mph. The trap speed was impressively high, but the ET (elapsed time) seemed too slow for that speed. My explanation was that because the car was losing about 1.5-2 psi of boost in the upper RPM range (in first and second gear especially), it was losing about 20 rwhp past 5500 RPM (and I was shifting at 6900 RPM). Therefore, the ET seems slow, but below 5500 rpm it makes up some nice speed, hence the high trap speed.
Fast, but not fast enough!
The car was running great, but my insatiable appetite for power soon led me on a quest for what I considered the holy grail--a fully built engine and 330+ rear wheel horsepower...